 Kubic - Retired
Getting started with kubeadm on Kubic
20. Aug 2018 | Richard Brown | No License
kubeadm now available in Kubic
As discussed in our recent announcement we’ve been working hard in our new direction, integrating kubeadm as a primary method of setting up a Kubernetes cluster on openSUSE Kubic.
After this short time, we’re proud to already be able to share that as of Snapshot 20180815 released this weekend, openSUSE Kubic now has a working kubeadm solution out of the box. This blog post provides a brief guide on how to use it in it’s current form, and some sneak peaks about where we plan on improving and changing things going forward.
Please Note: kubeadm on Kubic is under heavy active development. While everything in this guide works at the time of publishing, it is expected that details will change in the near future. Where known some of these likely changes will be mentioned, but for more recent documentation please look at our Wiki, especially the article on kubeadm.
Why should I want to use kubeadm?
kubeadm is a toolkit produced by Kubernetes upstream for the creation and upgrade of Kubernetes clusters. Kubernetes is increasingly the primary way for running containerised applications at scale.
Designed to operate across a cluster of machines, VMs, or cloud instances, Kubernetes uses the hardware available to it to create fault tolerant, load balanced clusters for running containers. Containers are grouped together to make logical units (pods) that can easily be managed, discovered, and remain operational even in adverse circumstances.
Put simply, if you want to run containers across multiple servers in a coordinated way, you probably want to use Kubernetes, and kubeadm is the way the Kubic project recommends for setting up Kubernetes.
If you only need to run containers on a single server, then we recommend using MicroOS, which offers both the Podman and Docker container runtimes for running containers on a stand-alone system.
How to setup kubeadm on Kubic
NOTE: This article is now out of date, please read the current documentation on our wiki.
First, you need to download a recent installation media of Kubic. Any version after 20180815 should work. NOTE: Offical VM images are something we’re already working on, but are not ready yet
For installing on bare metal, burn this media to a DVD or USB Stick, and then boot your first system from it. For VMs or VPS providers just boot the iso directly.
This first system will be the machine we will refer to as the Master, and will run the core Kubernetes services but not any containerised applications. That will be done by additional machines referred to as Nodes.
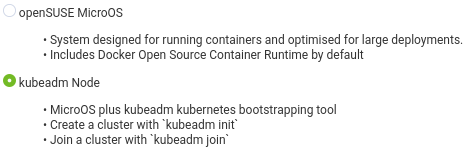
After selecting your language and agreeing to our license, you will be presented with the following “System Roles” screen. Select kubeadm Node
Follow the next step of setting a root password, and if you wish you can customise networking and other options before starting the installation. We recommend leaving the defaults unless you know what you’re doing. The installation will then proceed, and you will end up with the following login prompt.
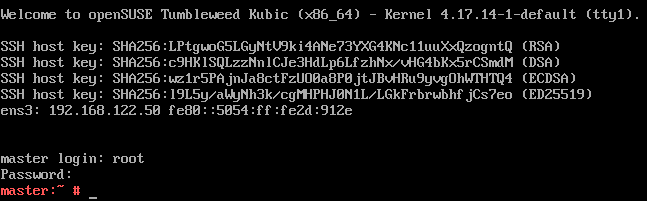
Login using the root password set during the installation. We recommend using ssh to login to the machine remotely, as it will likely simplify things like copy-and-pasting between machines needed later.
kubeadm is already installed, but if you dive right in and run the kubeadm init command you will get the following errors.

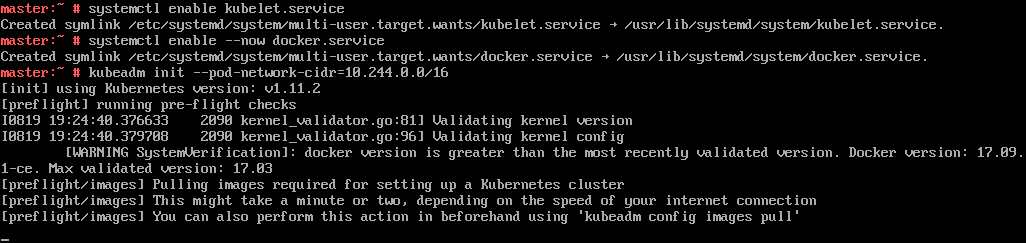
You can rectify these by running systemctl enable kubelet.service and systemctl enable --now docker.service. You also need to add --cni-bin-dir=/usr/lib/cni to the KUBELET_EXTRA_ARGS= line in /etc/sysconfig/kubelet
NOTE: We aim to eliminate these steps in future updates, including those which will introduce CRI-O as default.
Now runkubeadm init --pod-network-cidr=10.244.0.0/16
NOTE: The --pod-network-cidr=10.244.0.0/16 parameter is for setting up our currently recommended flannel networking interface (aka CNI). This recommendation is likely to be changed in the future
After a brief period, your Master should now be initialised.
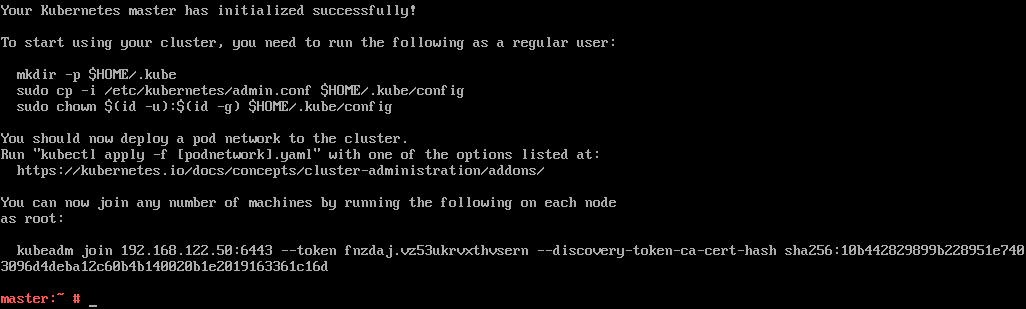
Take a note/copy of the line beginning with kubeadm join. You are going to need it to join Nodes to your cluster.
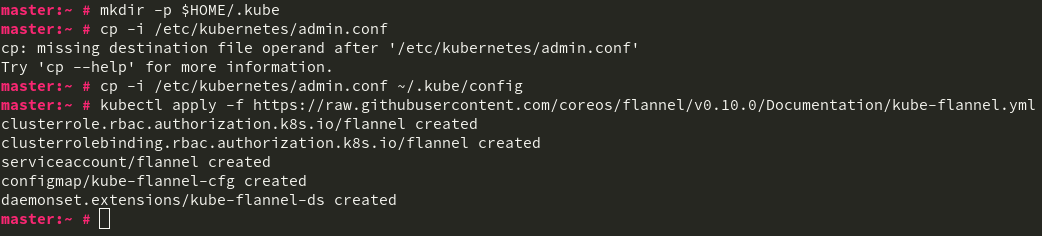
As mentioned in the success message, configure the root user to be able to talk to the cluster by running mkdir -p ~/.kube, then cp -i /etc/kubernetes/admin.conf ~/.kube/config
You can then setup flannel by running kubectl apply -f https://raw.githubusercontent.com/coreos/flannel/v0.10.0/Documentation/kube-flannel.yml
This now means your master is fully set up and ready for other nodes to join it. You install them the same way as your Master, selecting the kubeadm Node role just as before, and also running systemctl enable kubelet.service and systemctl enable --now docker.service after logging in as root after their first boot. Don’t forget to also add --cni-bin-dir=/usr/lib/cni to the KUBELET_EXTRA_ARGS= line in /etc/sysconfig/kubelet.
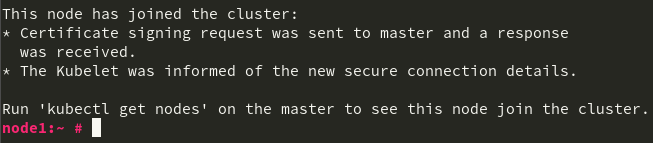
However, unlike on your master, you run the kubeadm join command by pasting the line that was presented at the end of the kubeadm init run from the Master.

After a short run, you should get the following confirmation that your node has joined the cluster.
Now from your master node (or any system with kubectl installed and the /etc/kubernetes/admin.config file from the master copied to your users $HOME/.kube/config file) you can run kubectl get nodes to confirm your cluster is operational.
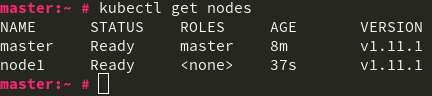
Congratulations! You now have a working Kubernetes cluster.
Next Steps
This is just the beginning of our journey to working with kubeadm as part of Kubic. As things are early in development we have already identified some rough edges we wish to address. Some of those include:
- Replacing the Docker container runtime as default for kubeadm with CRI-O
- Streamlining/automating as many of the steps documented above as possible, possibly in the form of a new ‘kubicstrap’ script to avoid getting in the way of people who wish to use kubeadm normally
- Official VM Images to eliminate the installation steps for virtual/cloud environments
- Build alternative kubernetes containers based on the rolling Tumbleweed codebase instead of the current upstream containers used by kubeadm
All of these tasks and many more are available for comment and open to contribution on our Trello Board. If you have suggestions for other features and functionality, please to add them there. If you wish to help us accomplish any of this, please feel free to dive in and get involved, there is no permission required and we will be very happy to have your help.
Alternatively, as with any new software, especially stuff we’re changing so quickly, there is a chance of bugs. If you try the steps in this guide and find any, please report them to our Bugzilla under the “Kubic” component.
Thanks, and have a lot of fun!
Categories: blog
Tags: